We're all a little crazy anyway and one of my cousins brought some wine, and we may or may not have gotten a little tipsy on top of our usual silliness and it was just hysterically good fun.
We did this for several years, but eventually everyone moved away from me, so I no longer bake every year. It just depends on my mood year by year.
I thought I'd share some tips I find helpful, and an idea I like to use for packaging them up.
From: Living - Martha Stewart
Decorating cookies can be as simple as using icing dots to make a gingerbread man's face and buttons, or as challenging as flooding and flocking with bright royal icing and tinted sugar. Follow the techniques below for beautifully iced cookies.
EQUIPMENT
Pastry bag with coupler
#2 tip for piping
#3 tip for flooding small cookies
#5 tip for flooding large cookies
ICING TIPS
1. Royal Icing can be made several days ahead of time and stored in pastry bags -- at room temperature if made with meringue powder or in the refrigerator if made with egg whites.
2. The icing can be thickened or thinned by varying the amount of egg whites and sugar. A thinner icing (with more egg whites) is best for flooding, since it spreads more smoothly; a thicker icing (with more sugar) is best for piping.
3. If the colors start to separate, gently massage the bag to remix the icing.
4. To fill a pastry bag: Place the bag tip side down in a glass about 3 inches shorter than it; fold the top of the bag down over the edge of the glass to form a cuff. Using a large rubber spatula, scrape the icing into the bag, filing it to one-half to two-thirds full. Unfold cuff, and close bag with a twist tie.
5. To prevent the tip from clogging, either place a damp paper towel in the bottom of the drinking glass, or insert a toothpick in the tip, and remove it just before piping.
FLOODING COOKIES
This process coats the entire surface of a cookie with royal icing.
1. Outline half a cookie with piping (thicker) icing, using a #2 tip. Rotate cookie 180 degrees, and outline the other half. Let the icing set, 5 to 10 minutes.
2. With the flooding (thinner) icing, using a #5 tip, draw zigzags over the cookie's surface.
3. Using a small offset spatula, spread the flooding icing evenly within the piping outline. Let the cookie dry overnight at room temperature.
4. When the flooding is dry, use the #2 tip to pipe your chosen design.
FLOCKING COOKIES
This process creates an effect like flocked velvet: Sparkly sanding sugar adds color and texture to the cookies.
1. While the icing is still soft, hold the cookie over a baking sheet, and sprinkle it liberally with sanding sugar -- a large-grain decorating sugar. Let the cookie sit for 30 minutes before shaking off excess sugar. Allow it to dry for several more hours before gently removing stray crystals with a soft pastry brush.
First Published: December/January 1997/1998
***********************************
A nice icing "how-to"
Flooding technique
**********************************
I did this one year, although I didn't use the initial cut out...I just used a cookie that fit the recipient. I used a basic gingerbread recipe and they smelled so good!

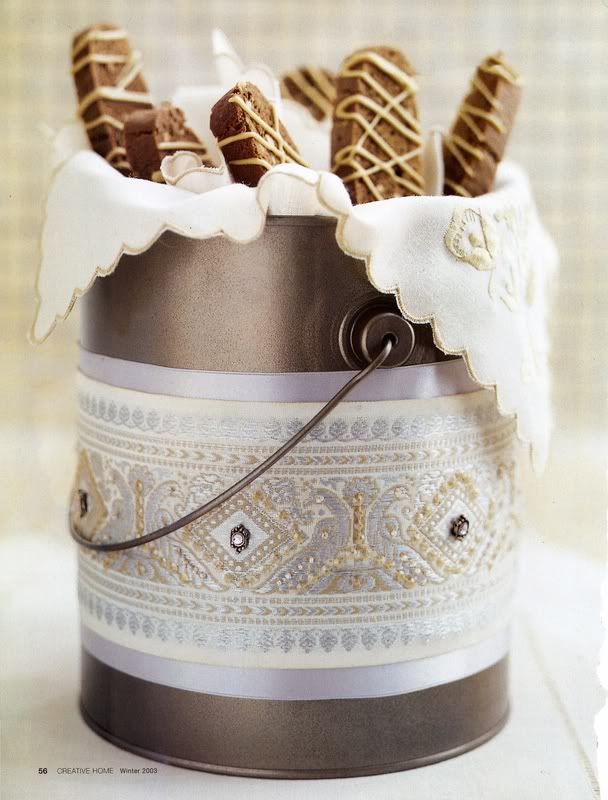
A pretty way to present your cookies, it's my favorite presentation:
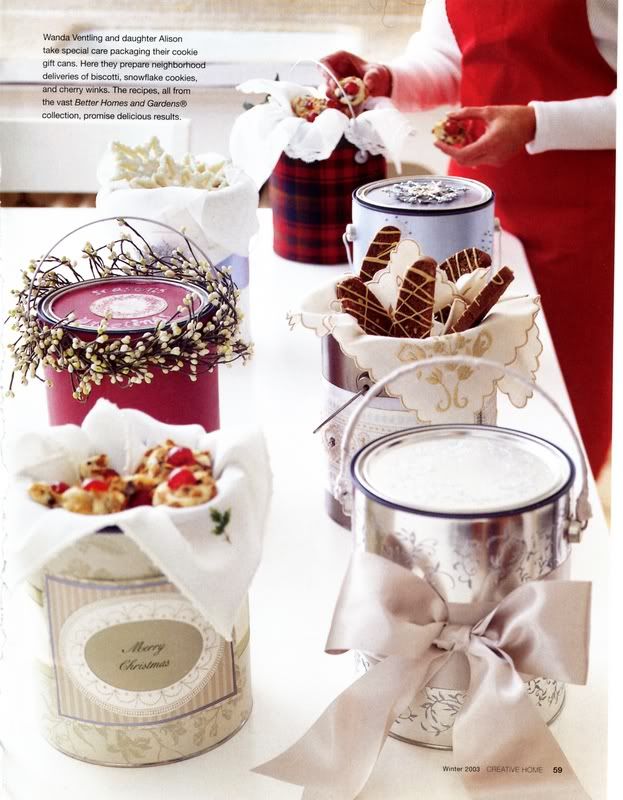
Close ups of a few:

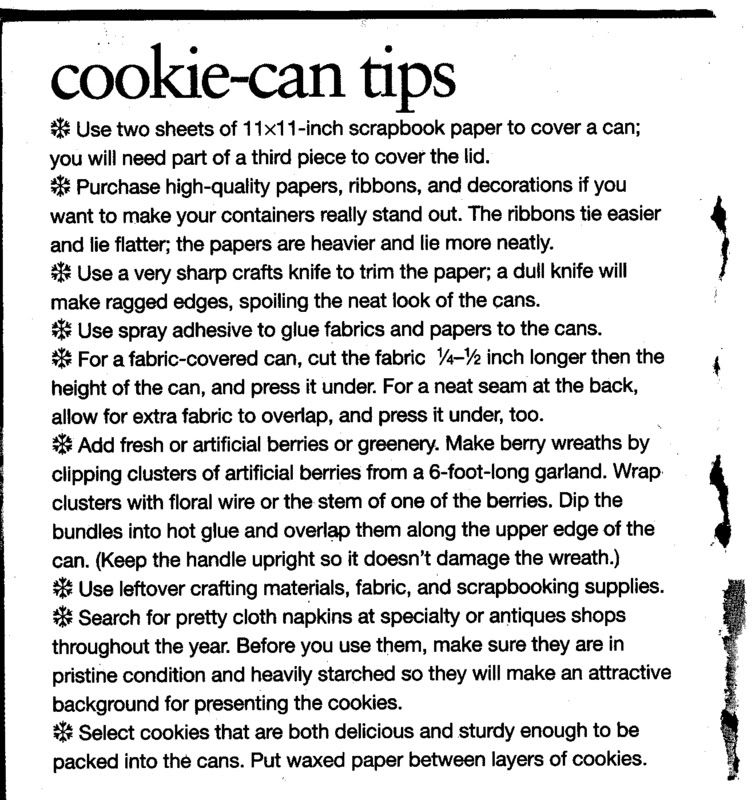
Here are some tips on how to make the cookie cans especially nice!
Merry Christmas-In-July-Eve!
I am going to do the paint cans for my cookie exchange this year! What a great idea for delivering cookies!
ReplyDeleteFabulous tips, big sis!!! Mwaaaahhhh!!!
ReplyDeleteThose are super cute and chic even! :) great idea
ReplyDelete